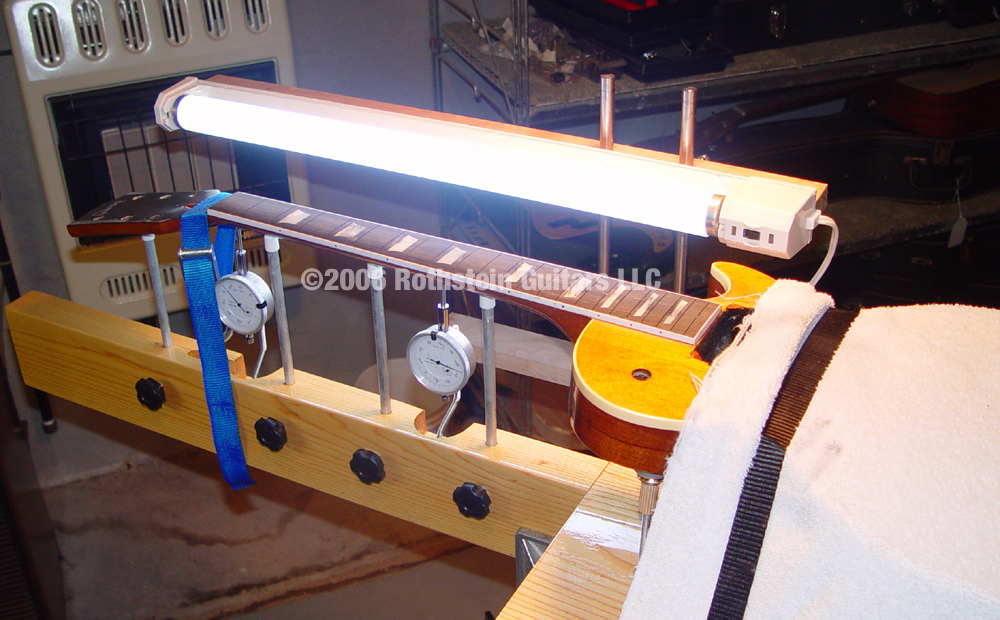
Fret Installation The guitar is strapped into a homemade neck jig (based upon one by Dan Erlewine). The main benefit of the neck jig is so you can fret the guitar while simulating sting tension which is extremely valuable. Click on the first image below to get a larger view of the neck jig.
Fret slots are cleaned which isn't too difficult on a brand new fretboard!
Fret slot edges are champfered using a small file prior to fret installation.
The fretwire needs to be cleaned with naptha, and then run through the fret bender ro perfectly radius the frets prior to installation.
Cutting the fretwire.
I love this tang nipper which is used to trim the tang. It does an outstanding job of undercutting fretwire to fit over neck bindings, and speeds up fret jobs on bound necks.
Close up after using the tang nipper.
Frets are glued in and clamped using radius block and clamps.
Waiting for the glue to dry.
After the ends have been trimmed, and the frets dressed. We didn't include pictures of fret dressing, but you can view another pictorial on fret leveling l I have posted to the site.
On to the next pictorial in the series (the completed project)
|